
Over the years, Carl Heideman and his crew have taught hundreds of people to weld at his hands-on workshops at Eclectic Motorworks. We asked him to share with us his recommended best practices for executing clean, perfect welds every time. The welds in this story were performed by 15-year-old Jack Heideman.
We’ve seen the good, the bad, and the ugly, and the truth is this: Much of the difference between good, bad and ugly welds is pretty subtle. Good welding isn’t magic; it’s really just a matter of discipline and practice. We’ve found that by teaching some pretty simple techniques, bad and ugly welds quickly turn into good welds.
The most important area for discipline and practice is around the welding stroke. A good, straight, consistent stroke will make nearly all welds great. While that stroke just comes naturally for some people, for most it takes some real dedication. Just like an athlete practices regularly, so should a welder.
Follow along as we show you the best techniques for a good welding stroke. Practice them yourself and develop your own consistent, disciplined approach to welding.
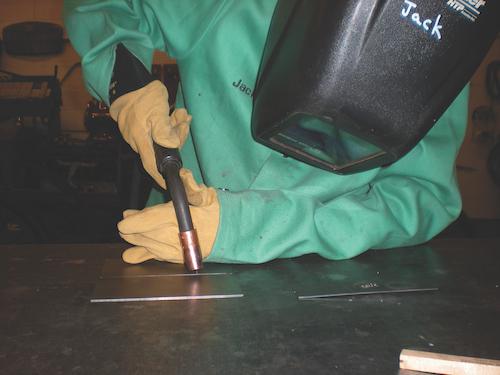
Tip #1: Hold the Torch at the Correct Angle
Hold the torch as close to perpendicular as possible. Tilt it just enough so that you can see your line and the weld puddle. Generally, that’s about 15 degrees off perpendicular. Too often, we see welders holding the torch in a lazy manner, causing it to settle down to around 45 degrees off perpendicular. That angle won’t evenly distribute the shielding gas.
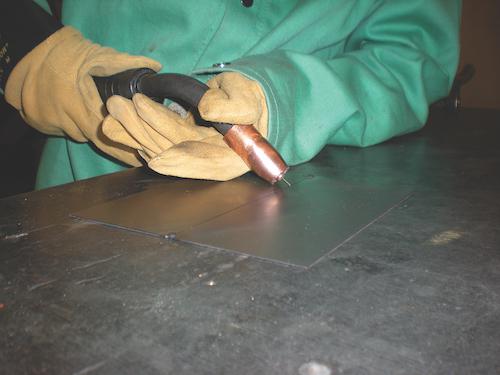
This lazy grip is far from ideal.
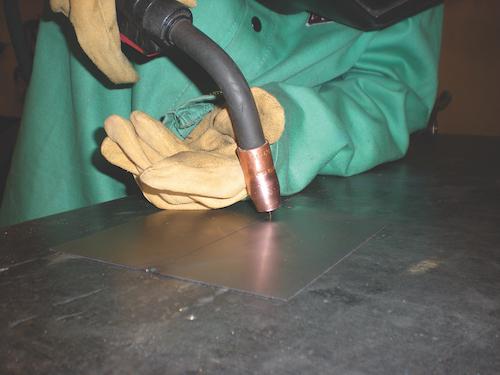
This is a good grip on the torch.
Tip #2: Properly Space the Torch From the Weld Puddle
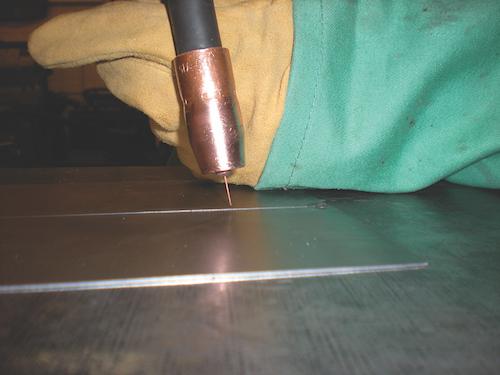
Once the torch is in the correct position, it needs to be the right distance from the weld puddle. The general rule is to hold it as close as possible without dipping it in. That’s usually about 1/8 to 3/16 of an inch. Often people start too far off, or gradually pull the torch away as they lay the bead. We commonly see our students ending a welding stroke 1/2 to a full inch away from the bead, and that’s a formula for bad and ugly welds.
A lazy stroke typically ends with the torch too far away from the work. No good welds come from this.

The torch should be right down on the work, just fractions of an inch away.
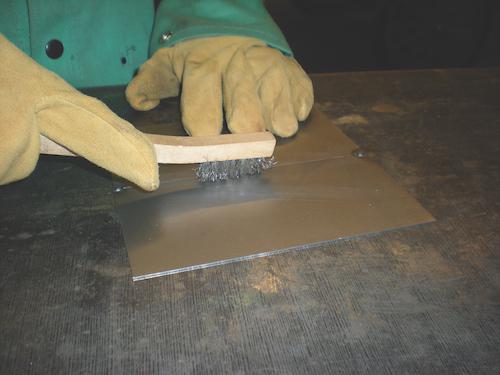
Tip #3: Clean the Work Area
Cleanliness really counts for a quality weld. This is something you can practice, too. Before every weld, clean the weld area thoroughly with a wire brush, and clip off the dirty blob at the the end of the welding wire so you can start clean. Clean the joint very well before every weld.
Tip #4: Snip the Wire Before Welding
Before laying down a new bead, snip the wire blob that remains from the previous pass. Ideally, just about 3/16 of an inch should poke out. Not only does this keep the weld joint clean, it helps get the torch the right distance from the work.
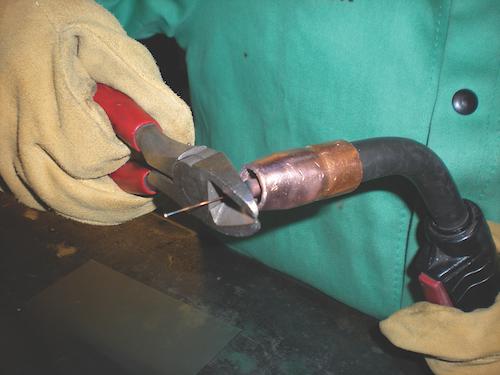
Starting with a dirty surface and a blob at the end of a wire that’s sticking out too far is a surefire formula for a bubble-gum weld.
Tip #5: Practice Your Strokes
Just as a tennis player practices serving, a baseball player practices throwing and catching, and a soccer player practices kicking and dribbling, so should a welder practice making a good stroke. Before every weld, a couple of practice passes will ensure a good stroke every time.
A good practice stroke will scratch the wire along the weld path. Not only does this make sure the weld stroke will stay on course, but scratching the wire will prevent the torch from lifting as the stroke progresses. One practice stroke helps, but two or three are even better for developing muscle memory that will really make for an accurate weld.
In order to keep that stroke on course, you need to see what you’re doing. A good helmet with a very clean lens is a good start, but good vision is something that can be practiced as well. If you can’t see, you can’t weld. As you’re welding, make sure you can see the line and puddle well. If you can’t, adjust your helmet, the position of your head, or the lighting around your work until you can. Good sight is just as much a practiced discipline as a good stroke.
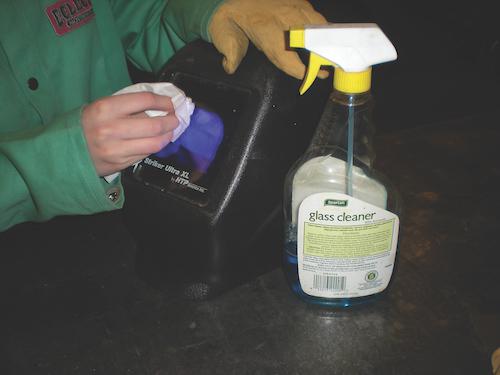
Tip #6: Clean Your Lens
It’s common sense, but a clean lens is easier to see through than a dirty lens. You can use household glass cleaner and a tissue.
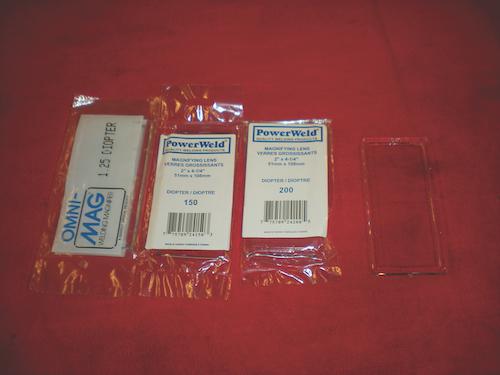
Tip #7: If You Need a Magnifying Lens, Get One
Magnifying lenses can help a lot. If you’re having trouble seeing, get one of these lenses from your welding supplier and find out if it helps your sight. They’re available in standard reading glasses magnifications, starting at +1.00 and going up 0.25 at a time.
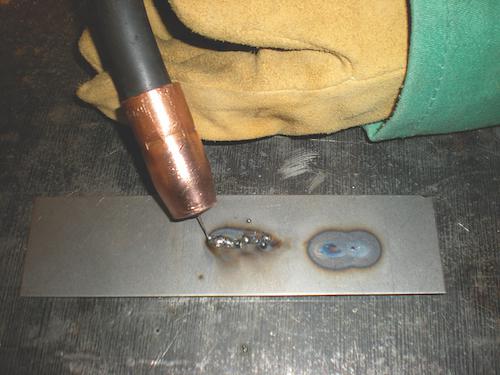
Tip #8: Stop When There’s Trouble
The last discipline to practice is the one we see violated the most: Stop the instant you know something’s going wrong. Too often, people think they’ll correct their welding problems on the fly. Experience has taught us that this practice usually makes a small problem worse. A better practice is to stop immediately. Next, analyze what happened, consider the corrective action, clean and clip, and then move along.
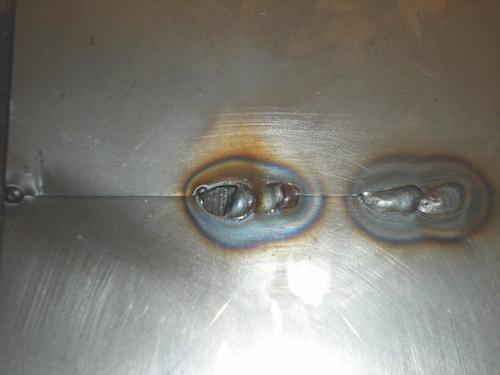
On this weld, a small hole developed and the welder tried to correct it on the fly. The result: a big hole and a big helping of frustration.
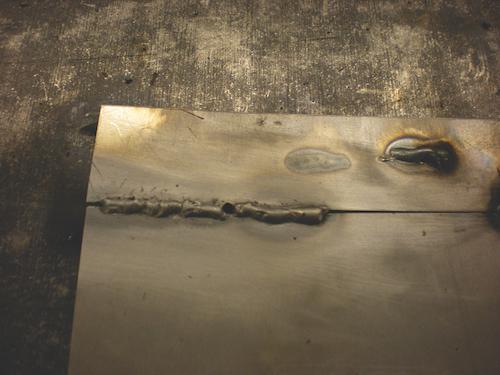
A small hole is easier to fix if you stop right away—before it escalates into a bigger hole. After stopping, this welder went on to finish the rest of the work. Then, after some cleaning and a good, disciplined stroke, the hole was easily fixed.
Like what you’re reading? We rely on your financial support. For as little as $3, you can support Grassroots Motorsports by becoming a Patron today.
Comments
View comments on the GRM forums

Good article. The ‘you can’t see, you can’t weld’ part though probably should have said you can’t “learn” to weld. My next door neighbor is a professional fabricator. I’ve seen him lay down a stack of dimes by staring at it for a few seconds, turning his head away, and pulling the trigger. No helmet involved. LOL.

Yeah, I try to do those things. I think one other part is “how often do you do it?” Like many thing, if you only do it once a month or every couple months, it takes a while to get it all back “into the groove” of doing it right. I built the roll cage in my rally car (for the most part) and it’s pretty noticeable as to which welds were done early in the cage built and which were later in the build (they’re all sufficiently strong welds, but later ones are much, much prettier).
Next time I need to make sure to do the early welds in places that people can’t see as well, rather than in the most visible places lol.

I’m a big fan of weld.com’s YouTube channel. They have a ton of instructional videos on how to be better welder that feel like you’re sitting in a class at the vocational school. I highly recommend it if you’re like me in that you are an ok entry level welder and want to step up your knowledge and understanding.

In reply to gearheadmb :
weldingtipsandtricks.com is my favorite, but weld.com is a not-distant second.

In reply to AngryCorvair (Forum Supporter) :
Thanks for the link (and the thermal insulation you left outside my condo door (in Toledo) about 100 years ago)!
randy
In reply to Randy_Forbes :
LOL I saw your name as latest poster on this and thought “isn’t that the guy in Toledo with an AH3000?”


Great article, have to start with the basics.
And if your one of the ppl. who doesn’t work year round (myself) and is getting back to it as the weather breaks. Few items I encountered over the last few weeks:
Clean and check that Mask. Clean the glass and give the sweat band its tri-annual washing. Hit that Test Button before your start and check those batteries – of course. But remember the Grind / Weld Mode Switch. Or, after your start your first bead and go half blind cause you left your helmet in Grind Mode last year. Wild guess who did that one…
![]()
This one important if other ppl. use your equipment.
Check those consumables. Read the Label on the Wire and check your Gas. That tank of C25 you know is full, runs out after the first 3 minutes. Your son has no idea how the tank is empty but that hole in his floor is no longer an issue.
![]()
@slowbird https://drivetribe.com/p/a-legendary-gt40-replica-best-of-OIkPWaieRYGkPeJ5WHmSVA
It’s a replica, but I, for one, don’t care.

Tips on setting the heat and speed would also be helpful. Sometimes I find it hard to get just right.
Recently I’ve been doing some stuff requiring funky positioning with not great lighting, and I’m really thinking about trying to rig up some sort of pen light that clips directly on the torch behind the nozzle. If anyone has done that, or has any ideas, I’m all ears…

OnTheChip said:
Tips on setting the heat and speed would also be helpful. Sometimes I find it hard to get just right.
I like to work backwards from that, assuming you’re talking about MIG. It is all about heat management of the materials you are welding to. The goal of welding is to make a puddle of metal that “wicks” into the two pieces you’re trying to weld together, and add to that puddle. So you need enough speed to keep the puddle going, but not so much speed that you’re just laying a bead on TOP of the metal instead of INTO the metal. Current follows from that… obviously if you’re burning through, you’re putting too much heat into the metal, so you either need to tone down the heat, or you need to pay attention and only weld for 2-5 seconds at a time, let the heat dissipate, weld a little more, etc. Butt welding stainless will really teach you this as stainless transfers heat very poorly, so all the heat you are putting into the weld will just sort of stay there until you burn through, but you still need a good amount of heat in order to get decent penetration.
It’d be nice if there were an easy rote checklist, but given all the different metal thicknesses, it becomes more of a feel thing that you just have to learn. Especially if you are welding, say, a thin triangle onto a plate. The thin triangle will need a certain amount of heat, but as you get close to the point, you’re just going to blow it away unless you pause and give it a moment.
You’ll need to log in to post.
Log in