
After years of dreaming of our own machined parts, we jumped down the rabbit hole. We’re not claiming to be actual machinists, but we are learning how to machine parts at home.
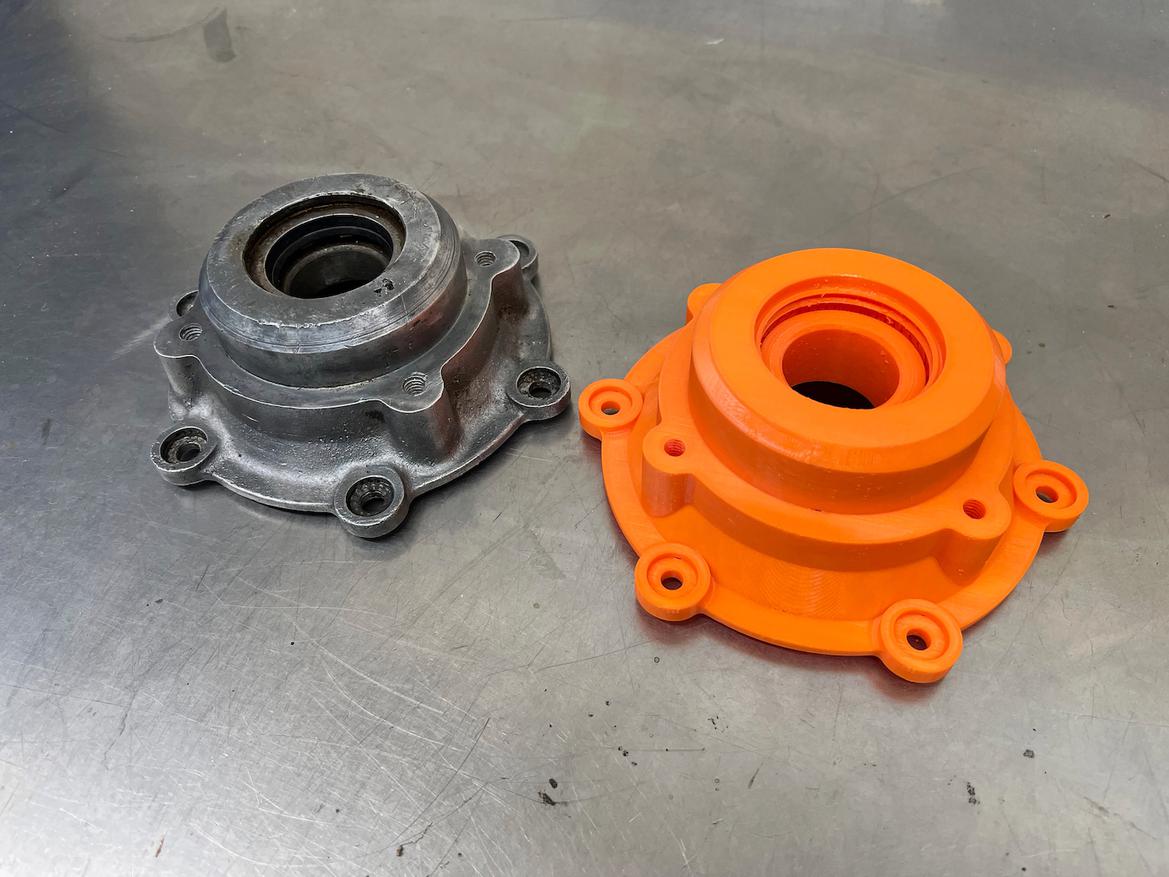
In the first installment of this series, we learned about design, technical drawings and CAD models. Part 1 concluded with some aluminum parts made to our drawings by SendCutSend, an online metal cutting company.
It also concluded with a regret: “Sadly, there’s no Control-P for physical parts.” Unlike this text, which our laser printer could spit out in 10 seconds, there’s no real equivalent for three-dimensional parts designed in CAD software.
At least, that’s what we would have written a decade ago, when 3D printers were expensive, temperamental devices reserved for professionals. But it’s 2022, and the future is here: As it turns out, there is a Control-P for your CAD designs thanks to the modern desktop 3D printer. So let’s get those files off the computer and into the real world.
3D Printer Types
There are two common methods of 3D printing at the consumer level: fused deposition modeling (FDM) and stereolithography apparatus (SLA), though SLA printers are often just called resin printers. Adding to the confusion, FDM printers are also referred to as FFF, which stands for fused filament fabrication. There are many other types of 3D printing/additive manufacturing, but if you’re looking for information on zillion-dollar Inconel powder laser welders, you’re probably not the right audience for this article.
So, let’s talk FDM versus resin printers, because you’ll have one in your Amazon cart before you know it.
FDM Printers:
It’s easiest to start this discussion with what you already own, the typical inkjet printer. When you hit print on a Word document, your printer sucks up a piece of paper and starts slowly moving it toward the outside world. We’ll say the paper is moving along the y-axis.
Let’s add that text: Your printer only has one color, black, and its ink cartridge moves back and forth across the paper, along an axis we’ll call the x-axis. That ink cartridge squirts out little dots of ink as it moves across the page.
By combining movement of the x (cartridge) and y (paper) axes, your printer can put dots anywhere on the page. And by combining lots and lots of tiny dots, your printer makes words appear. Congratulations, you’re now an expert on two-dimensional printing.
Where does that third dimension come into play? Meet the z-axis, which differentiates your 3D printer from a 2D printer. The z-axis allows the ink cartridge to move up and down instead of just left and right.
FDM printers work the same way regarding the x- and y-axes (though that piece of paper is replaced by a flat part called the build plate). But rather than squirting dots of ink, they squirt melted plastic. By squirting plastic in the same spot repeatedly, they add multiple layers along the z-axis–sometimes thousands–until they’ve printed a three-dimensional item.
What squirts the plastic? Not an ink cartridge, but something called an extruder. In its simplest form, an extruder is just a heated nozzle that’s fed plastic by a motor. That plastic is sold on rolls and called filament, and it looks like yard trimmer string.
SLA/Resin Printers:
Resin printers, rather than squirting melted plastic into the shape of parts, build things with a different method.
We’ll start with the setup: a big, square vat of curable photopolymer (usually UV resin), not entirely unlike that fancy glue your dentist uses. Like that dental glue, printer resin stays liquid until it’s exposed to UV light. Upon exposure, it instantly hardens into solid material.
So the printer has a big, square vat of UV resin, and if it’s all exposed to UV light, it hardens into a solid square block. But it’s not going to be exposed all at once. Instead, resin printers use an extremely focused laser, sort of like a more precise laser pointer, and shine it on only one part of the resin at a time. By waving the laser around, the printer creates layer after layer of hardened resin within the larger resin tank, until the print is complete and ready to be removed from the resin bath it was built in.
Choosing a Printer
Which printer is the right choice? As with most things, it depends. At the consumer level, FDM printers are usually less expensive, faster, and print stronger parts. Resin printers typically have a smaller build volume, and they require messy (and expensive) maintenance and consumables.
Pretty clear winner, right? Well, resin printers have an ace up their sleeve: quality.
FDM printers almost always fill your part with visible layer lines and will struggle with tiny details, while resin printers can print extremely smooth, detailed, consistent models. That’s why they’re the printer of choice for anybody building action figures, jewelry and the like.
For building race car parts, though, we’re convinced that an FDM printer is the way to go. And that choice opens up hundreds of options, with everything from $100 kits to $100,000 industrial machines available to FDM printer shoppers. We wanted the Miata of printers: something inexpensive, common, and with a strong aftermarket and tons of free knowledge being shared online.
Meet the Miata
What’s the Miata of 3D printers? We found the answer to this question on the Grassroots Motorsports forum: the Creality Ender 3.
This printer isn’t the best at anything, but it’s pretty good at everything, it’s inexpensive (prices hover around $200 unassembled), and it’s widely supported. We had one on our doorstep a few days after ordering and assembled it in an evening. Just like that, we were 3D printing in the garage. A normal Ender 3 has a maximum build envelope of about 8.6×8.6×9.8 inches.
But it’s not that easy.
Meet the Miata of 3D printers: Creality’s Ender 3. You can even modify it like a Miata, as illustrated by our glass bed and stiff orange suspension bushings.
You’d call us crazy if we explained there was a learning curve for your laser printer but, sadly, regularly operating a 3D printer can be difficult. Rather than set it and forget it, we quickly realized that keeping a low-end 3D printer running is a hobby all by itself.
Just as we aren’t CAD tutors, we also aren’t 3D printer professors. We advise you to just read the instructions carefully and be prepared to experiment with settings until you’re able to produce clean, consistent prints. For us, that meant about a kilogram of wasted filament and a few aftermarket upgrades, including adding a glass bed ($13), swapping from sprung to solid bed mounts ($9), and upgrading our extruder to an all-metal hotend ($20). We also bought a $70 enclosure to prevent drafts from warping our prints and to keep out the dirt and grime floating around the garage.
If you’ve ever tinkered with R/C cars, tinkering with your printer will feel remarkably similar. Don’t be afraid to dive under the hood.
3D Printer Materials
So you’ve bought a printer, given it a thorough tune-up, and printed a few test models from Thingiverse. Time to put it to work in the garage.
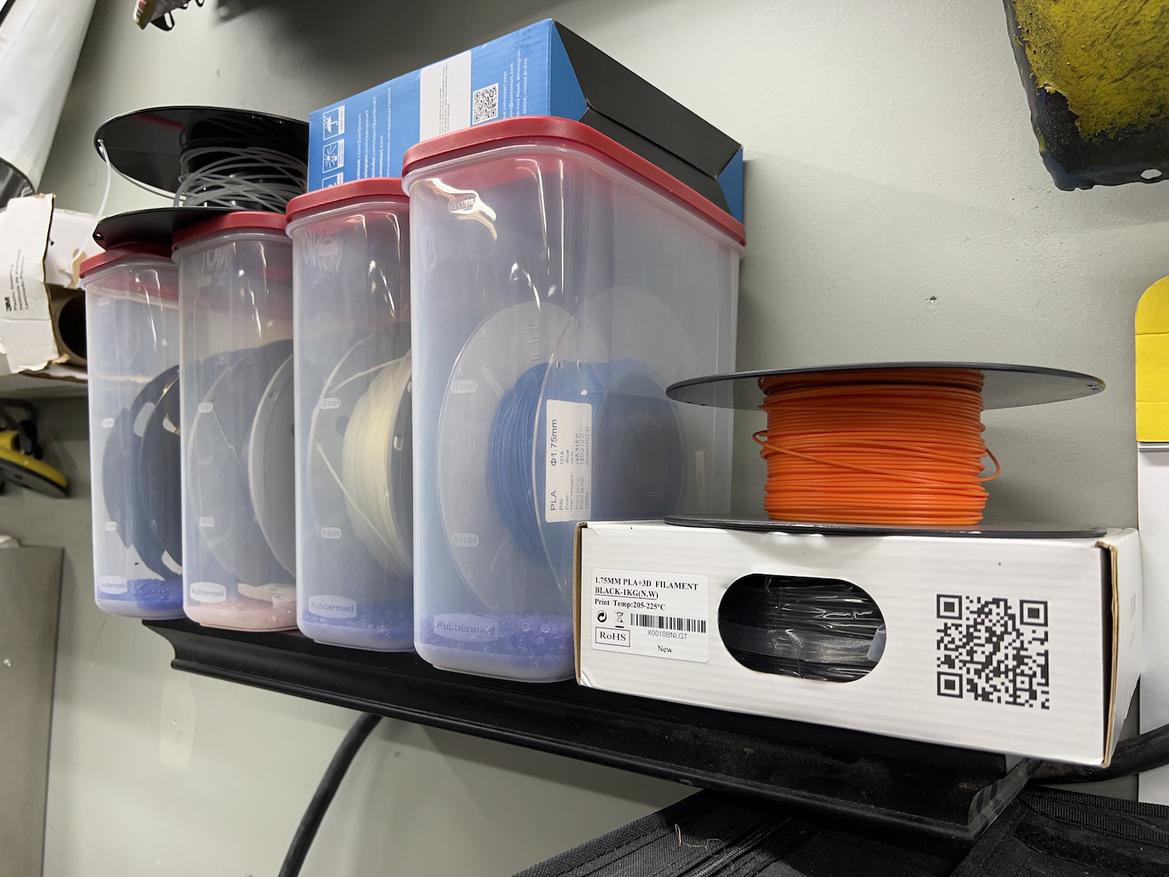
What can you do with an Ender 3? Let’s back up a minute and talk about FDM printer material. That plastic filament isn’t just “plastic;” it’s a specific type, and there are lots of choices.
We’ll start with the most common option: polylactic acid (PLA), the default choice for 3D printing. This plastic is nontoxic, biodegradable, and prints very easily. But there’s a downside: It prints easily because it begins to melt at a fairly low temperature, roughly 125 degrees Fahrenheit. That low melting point means it isn’t suitable for most automotive applications, as it will start to deform even if left in a parked car on a warm day.
What if you want to print parts that hold up to automotive temperatures? Meet ABS and PETG, two common plastics that an Ender 3 shouldn’t struggle too much to print. After experimenting with both, we settled on PETG as the best compromise between printability and strength, and haven’t had an issue using it for all sorts of automotive projects.
PETG starts to deform at around 175 degrees Fahrenheit, so it’s perfectly suitable for anything on a race car that doesn’t directly touch the driveline or brakes. ABS has an even higher temperature tolerance–about 225 degrees–but that makes it even harder for a printer to print.
Meet the Miata of 3D printers: Creality’s Ender 3. You can even modify it like a Miata, as illustrated by our glass bed and stiff orange suspension bushings.
There’s also PLA+, ASA, TPU, nylon, polycarbonate and all sorts of fiber-reinforced filaments on the market. How do you choose? The most important metric is called the “glass transition temperature,” and it’s what we’ve been referring to when discussing each material’s heat tolerance.
Rather than the melting point, which is higher and means “your part is a puddle on the ground,” the glass transition temperature is the point at which your part turns from solid to more of a molten-glass consistency, meaning it starts to get all rubbery. That’s bad.
Once you’ve picked a material with enough heat tolerance for your application, the rest of the decision comes down to printability and suitability. TPU, for example, is flexible, while PETG is considered food safe if you’ll be printing parts for your endurance race car’s drink bottle.
3D Printer Slicing
Congratulations, in just a few thousand words you’ve learned CAD, designed a part, bought a 3D printer, and chosen a filament. It’s finally time to smash that print button and see your design come to life.
Just kidding, you still have to slice your model using a program called a slicer. This process turns your three-dimensional model, which that printer has no ability to comprehend, into a series of commands that it can.
Those commands are called G-code. There are a few popular free slicing applications, with Ultimaker Cura being by far the most popular. Fusion 360 also has a slicer built into its design environment. We’ve used both with success, and in theory every slicer can be tuned to output identical G-code.
G-code is the most widely used CNC programming language, and its structure is remarkably simple. A G-code document is just a linear list of movements for your machine to follow. If you draw a CAD model of a cylinder, the G-code for your 3D printer would basically read “Move in a circle at this speed while extruding plastic. Move up slightly. Move in a circle at this speed while extruding plastic. Move up slightly. Move in a circle at this speed while extruding plastic. Move up slightly.”
Your 3D printer will never know or care that you’ve drawn a cylinder. It just knows where to move its extruder and how fast to move it. At typical settings, a 1-inch-tall cylinder has about 150 of these circular layers.
Those layers are why creating 3D printer G-code is called slicing. Your slicer turns complex geometry into layers with vertical edges, meaning a perfect cone is made up of a bunch of stacked circular layers that gradually get smaller in diameter.
How tall are the layers? As usual, it depends. Layer height is a tradeoff between resolution and print speed. Taller layers require fewer of them, but those vertical layer edges are more visible. Shorter layers have much less visible layer edges, but far more must be printed for an equal-height print.
Your slicer won’t just ask for a layer height, though. In fact, you’ll find hundreds of settings, from fan speeds to retraction distances, support, infill and more. We won’t dive into all of them here, but there are a few you should know about.
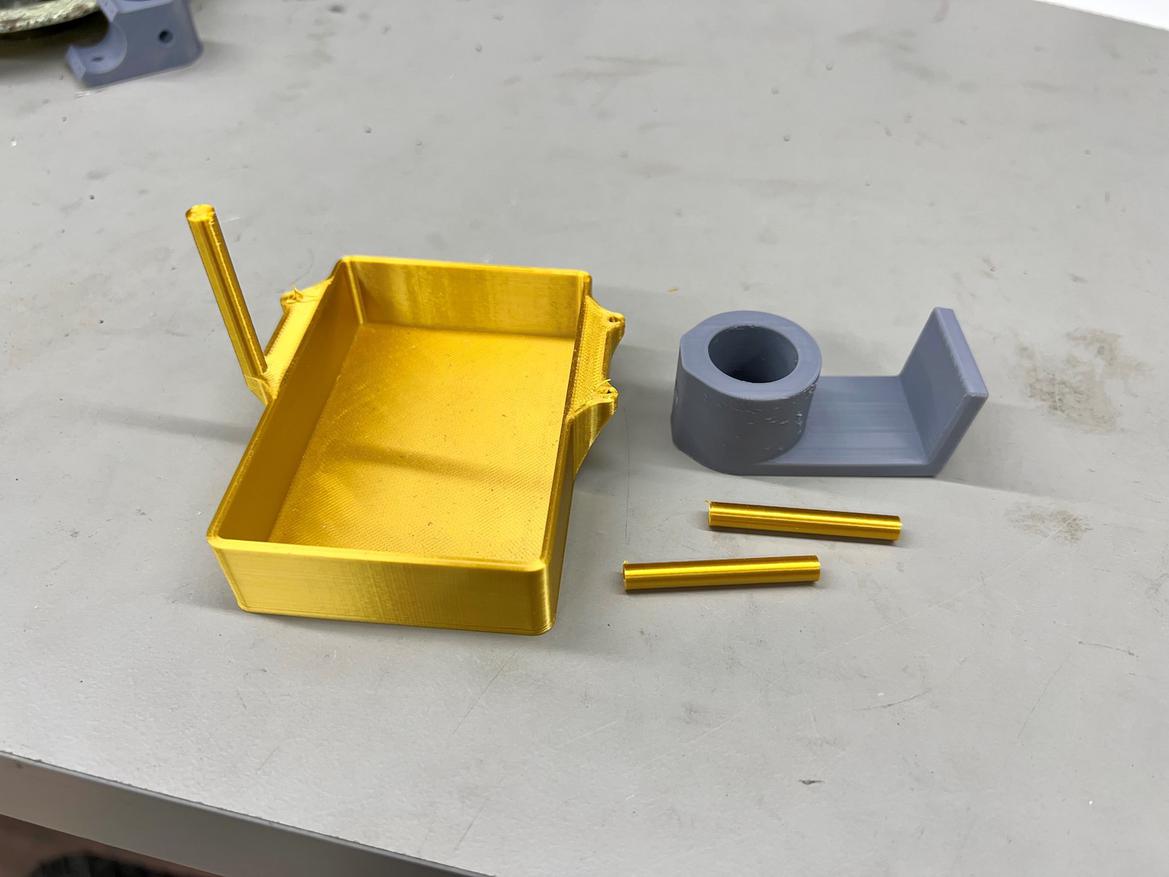
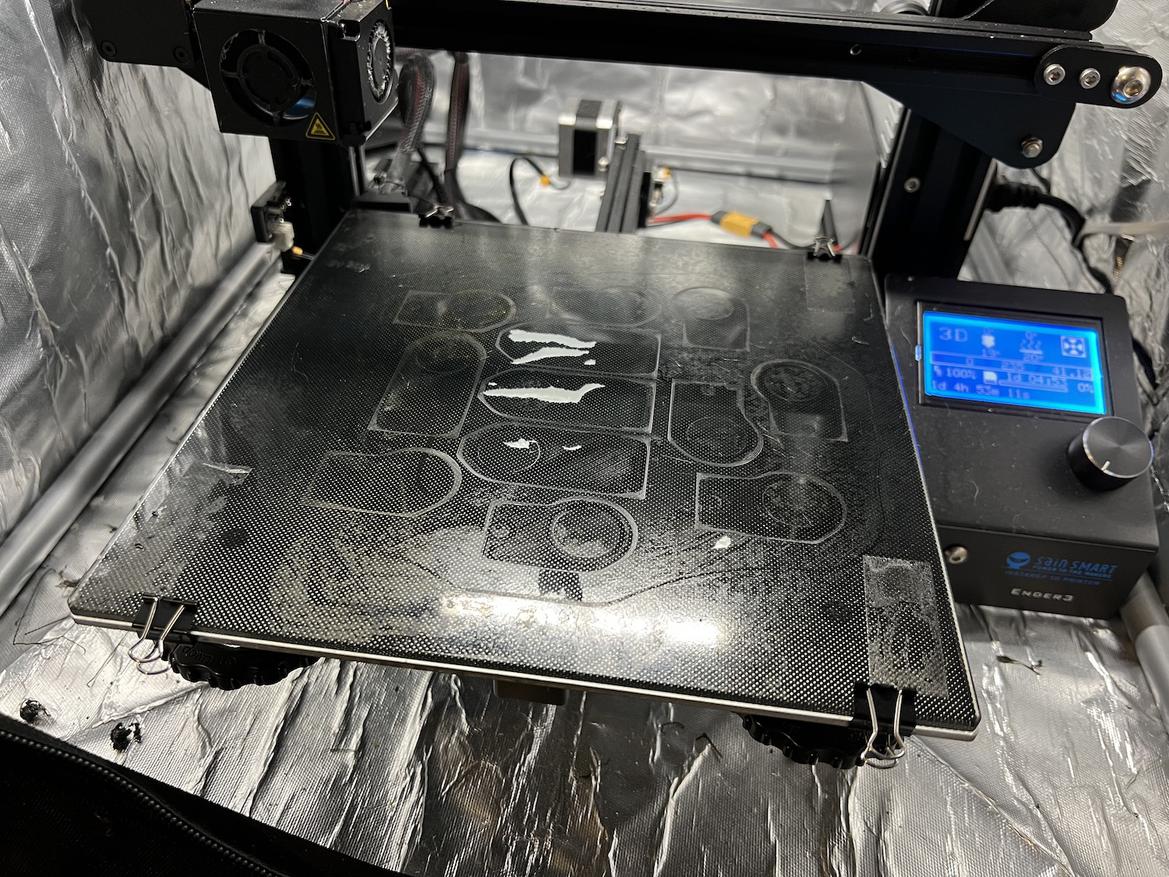
3D printers are able to make complex parts, but pay close attention to layer orientation when slicing. Try to keep forces parallel to layer lines, unlike this first attempt at the gold fuse box cover.
Orientation:
How you orient the part on your build plate matters. Changing the orientation can improve strength, reduce material waste, lower print time and more. We always try to print our parts so the highest forces are parallel to our layer lines, meaning they’re spread across each layer rather than trying to pull the layers apart from each other.
Infill:
You’ll see this term tossed around a bunch, and it’s a big part of how strong your 3D printed parts will be. Unlike injection-molded plastic parts, which are full-density plastic throughout, 3D printed parts are printed as hollow shells, with infill in the middle. This infill can take many shapes, with the most common being a grid or cubic pattern of interlocking lines.
We print parts that are just for show or test-fitting at 15% infill (meaning 15% of the interior volume is plastic), while structural parts seem to like at least 50% infill. And when we do print something fully solid, it’s usually stronger if we make the walls an infinite maximum thickness rather than to turn the infill up to 100%.
Temperature:
Every filament, and sometimes even a certain roll of the same filament, prefers a different temperature. It’s important to experiment with different bed and extruder temperatures, and even vary them depending on what you’re printing.
Building something nonstructural with a lot of unsupported extrusions? You may want to lower the temperature to improve bridging. If you’re printing something structural where appearance isn’t as critical, it might help to print at a higher temperature to improve layer adhesion.
Support:
3D printers can’t print on air; they can only print on top of something else, which is usually a build plate to start and then layers of plastic.
But what about when a part has holes, arcs or overhangs? Printers can accommodate printing at an overhang (usually around 60 degrees), but beyond that you’ll need to explore the world of supports. These are additional plastic structures, printed under those overhangs, that you’ll snap off the part once it’s done printing.
Time:
Welcome to the most precious resource in 3D printing: time. Printers may seem like magic, but that’s before you realize they consume cubic amounts of time to make parts. It’s not uncommon for modest prints to take 4, 6, 12 or even 24 hours, with our current record for longest continuous print clocking in at more than 38 hours. Every setting you change impacts the amount of time your part takes to print.
Comments
View comments on the GRM forums

Just finished a print last night – about 29 hours long. A flower pot for my fiance (she’s teaching a class at a comm. college on house plants and one of the nights will be about creative potters or something…so why not print a few things out and she’ll have this other world of ideas to show)
I like having this toy, but it doesnt get used a ton, honestly. I go through spurts of using it, then long times NOT using it.


I bought my kid a 3d printer years ago, but it was terrible and the heated bed wasn’t flat.
I drug it out to play with it a couple of weeks ago and got frustrated.
I bought an Anycubic Vyper – the auto bed leveling did it for me. It prints great out the box.
Looking forward to more articles in this series.

I’ve been printing for 7 years now. If anyone is looking to get into printing, skip the cheap chinese junk (Creality) and get a Prusa. The Creality machines can print, but not terribly well, and not consistently. I can’t tell you how many people I’ve heard say then went out and picked up a cheap printer only to hang it up after a few months.
It’s an amazing tech and tool, but at the lower prices, it’s a hobby that needs constant tinkering.

In reply to DrBoost :
For the average person I 100% agree if they know they’re going to be serious about it, but for nearly anyone on this forum I imagine a Creality-level machine would be just fine. I jumped into an Ender 3 back when they first came out and yes, it had a little bit of a learning curve, but after a couple printed upgrades and some learning it’s now 99% hit print and forget for less than 1/5 of what a Prusa runs. No, it doesn’t turn out anything production ready and isn’t the fastest or biggest, but it has absolutely opened a world of possibilities. A Prusa-priced machine just was/is not possible for a college kid like me nor is it very palatable to test the waters with.

I’m at a bit of an impasse with 3D printing. My Ender 3 is an endless source of frustration. It doesn’t stay level, the prints don’t stick to the bed, it clogs, there are feed issues. I’ve done a bunch of upgrades, some stuff I printed to better guide the filament and some I purchased, like better springs for the bed. But it still requires constant fiddling and adjusting.
But, like someone said above, I don’t use it all that often. I’ll go through a period where I make 3 or 4 things, then it will sit for months. Based on that, it’s hard for me to justify spending the money on something better, so I guess I’ll keep fighting this thing.

In reply to m4ff3w :
I had the same problem with leveling and sold mine, good to hear that the auto bed leveling changed the game for you, I might consider buying one now.

I have access to a good industrial printer, but I find myself using my Ender 3 quite a bit for useful stuff because it’s just quick and easy. In the past few days, I’ve printed off some custom bushings for my Vanagon’s transmission cables, a couple of sets custom-sized standoff and some cable brackets. Further back, I’ve used it to develop parts for a big brake kit including printing a complete model of a $2000 caliper that helped me decide not to go ahead and buy the actual caliper. I also use the Ender to confirm my models before booking space/time on the Makeforged. At the price I paid, I don’t need to have it running constantly for it to pay for itself, it’s more like owning a welder or a drill press. The thing that separates me from printing enthusiasts is that I never print stuff for the sake of printing stuff, for me it’s a tool and most of my prints are my own designs.
The Ender worked pretty darn well out of the box and most of the modifications I’ve done have been for convenience, like the Octoprint controller. Tightening up some mounting screws under the bed made all the difference for keeping it level. I use the Creality glass bed almost exclusively with some hairspray for both ABS and PLA.

 I bought an Ender 3 V2 about a month ago and have already printed some coolant line adapters for the Fmod. And a birdhouse for the wife. Out of the box, no problems.
Tom_Spangler (Forum Supporter) said:
Huh. Makes me wonder if all my fiddling and modding has made mine worse.
I’ve kinda put that together from the V2 Facebook page, all these guys mod these things and change firmware and so on… then they complain how everything they print is a mess. The above was my first shot with FreeCad and the printer, they will be reprinted in TPU when I’m ready.
Tom_Spangler (Forum Supporter) said:
Huh. Makes me wonder if all my fiddling and modding has made mine worse.
I doubt you’ve made it worse. It’s an introductory level printer that puts out passable prints out of the box (for a while).
My daughter has an Ender 3. I moved on to IDEX and even considered an Ender as my starting point but I figured why start with a light-duty design for heavy lifting?
but that’s beside the point. There are mods I recommend to creality users right off the bat, like a flat bed, dual geared extruder, Capricorn tubing, a UL listed power supply (don’t think they come with them yet), and an all-metal hot end. At that point ($), there are other printers that are better, like the Anycubic Vyper.
I paid $175 shipped for my Ender 3, and spent $20 on a glass bed. I’m not sure what part of the hot end isn’t metal, but at less than half the price of this Viper I’m pretty happy with it. I’ve never seen any reason to change the extruder, it works. I will admit that I changed to Capricorn tubing because I was told I should, but that was $13. Had I been looking at a $400+ bill from the start, I probably still wouldn’t have a printer. Mine’s been quite solid and a good reliable tool for the past year.
It’s like telling someone they shouldn’t get a Miata because it’s not as good as an S2000. There are still a lot of happy Miata drivers.
What I seem to notice, and maybe I said it upstream, the more I use it the better it runs.
After sitting a while the first try or two sucks. But then it works.
Only upgrade Ive done is fix the plastic spring-loaded trigger thing to insert filament into the feeder. Mine broke, that’s why I replaced it.
In reply to Keith Tanner :
I didn’t mean to come off like I’m ripping on Creality, or it’s happy users. Some are happy with them after only a few mods.
Unbeknownst to me as a newbie, my first printer was made from very high end components. What a workhorse that was. I kept hearing about this new company, Creality, and the new CR-10 printer. JUST AMAZING!! So I sold my MakerFarm IV3 and picked up a CR-10. I was disappointed right away.
Non UL listed power supply, safety features that Creality decided to turn off in the code (why? Do they WANT my house to burn down???), cheap components. It wasn’t consistent and I’d say 30% of the prints approached the level of the Maker Farm I sold to buy the CR-10.
Then I picked up an Ender 3 V1. No better than the CR-10, maybe worse. Won’t hold bed level from one print to the next, same unsafe power supply, same inexact limit switches, and on and on.
my daughter has an Ender. Same story.
to use your miata / S2000 analogy; if you’ve only ever owned a miata, you have no idea how good an S2000 can be. But if your content with the Miata, just keep having a blast!!
all that said, I’m just happy to see people getting into 3D printing because that keeps the industry marching forward. Love it! And I think the Ender is worth the price. They must be $35 by now LOL. That was not a dig, I just can’t believe how the prices keep coming down. Seriously, they are crazy inexpensive, they get people in the door. That’s also the issue. They’re crazy cheap and inexpensive. But if it works for your needs and you’re enjoying it, keep on extruding!
I didn’t intend to derail the thread. This post is why I think 3D printing is a game changer. I’ve said it here before, but I’ll say it again. 3D printing is changing our world. For less than $200 you can be printing prototype parts in your home that would cost THOUSANDS through the conventional methods.
For anyone, but especially those who are struggling, I highly recommend going to youtube and searching for the Teachingtech channel.
Michael is a great teacher and has more 3D printing content than you can throw a benchy at. He also has a web site that has many different calibration tools, even generates the gcode for you. Spend a few hours on his website and your printer will be printing better and more consistently.
For all those complaining about the bed not staying level on the ender, get rid of the slack on the carriage underneath 🙂 It’s not in the instruction manual but if you just waggle the bed back and forth while looking underneath you’ll see what you have to do. You can do it without taking anything apart, and the bed will stay nice and consistent when you’re done.
The issue on the cheap one we had, wasn’t that the bed wouldn’t stay level, it was that it warped or came warped. But it was a $150-ish dollar printer from the time before the Ender 3 came out.
The Vyper was ~330 – but for me, the auto bed leveling was the reason I wanted it – and it has a bunch of the stuff people with the Ender 3 often end up going to anyways.
I was able to print-in-place parts with a .15mm tolerance that actually move, out of the box.
The only thing I see changing anytime soon is using an old phone for Octoprint (Octo4a) and a hardened nozzle so I can print some of the abrasive filaments.

I have an Ender3v2 which I have printed unobtainium parts for my Alfa Spider in PETG and TPU. Also, parts for friends for other projects. I have made some simple mods to increase reliability. You have to have patience using it, it is more art than science. The good thing about the ender there is large community of users and lots of YouTube videos to help you. If you can not get an Ender 3 to work, you better give it to a 11 year old kid or buy on line from a service. We buy on line at work to see prototypes, which has saved us from buying the wrong hard tooling.

So, PLA barely works in the engine bay. I printed this throttle cable grommet with the work printer, an ancient Makerbot Replicator Z18. I figured it would last a while since it’s small with thick walls and the exhaust is on the other side. It’s been through 2 Texas summers, but I’ll replace it before the 3rd since I don’t want to experience sudden diminished throttle opening.
I’m replacing it with mineral filled Nylon 6 from Shapeways. Probably overkill but I want to see how it’s finished because I have a bigger project in mind for that.


In reply to j_tso :
I’m amazed that thing lasted 30 seconds. PLA is THE premier material for making things that don’t stay together above 140 F.
I have an Ender 3 V2 Pro. I upgraded the springs and shimmed the z-axis motor. I’ve have virtually no problems with glue stick on bare glass. I level maybe once every week of continuous printing.
I also found that getting the leveling close enough then adjusting the z-axis height during the first layer is the easiest way to tune leveling. Finding that setting was a revelation.
You’ll need to log in to post.
Log in